Own your screenshots
I work with someone who shares a lot of screenshots to help with context. It’s super useful when having text-based asynchronous conversations. Especially when the context is a little ambiguous. Something visual is almost always more helpful.
One thing I noticed about his screenshots was that they always came via a link. Not only that, but the link was a subdomain from his personal site.
The more I saw it, the cooler I found it, so I asked him what his setup was.
He said he used Dropshare + AWS S3 and setup his subdomain to point to the bucket.
Digging into Dropshare further, I noticed that they also supported Backblaze B2—among many other providers—which caught my interest.
I’m already a B2 user for personal storage, and I’m not the biggest fan of Amazon—AWS gives me nightmares—so if there’s a decent alternative, I’m all for it. I’m also a big fan of “owning” the storage where my screenshots and recordings are kept.
After spending about an hour getting everything setup, I figured I’d do a little write up to share my experience wiring together Dropshare 5, Backblaze B2 and Cloudfront. Not only to remind me what the architecture is, but I found a few gaps in pre-existing documentation that I’d like to fill.
A few things to note: I’m going to assume you already have accounts for Cloudfront and Backblaze setup, and are familiar with how to use them! I’m also going to assume you have a domain setup in Cloudflare already.
This is also all based on APIs and interfaces live June, 2023.
What you need
- A free Cloudflare account with a domain setup
- A Backblaze account with B2 enabled
- A copy of Dropshare 5 (available through Setapp ← Sign up with this link for a free month)
npmandgitinstalled on your machine
Initial setup
Take a few minutes to think about what subdomain or domain you’d like to use when Dropshare creates links.
For example, I used s.alexcaza.com as mine.
If you already have a domain you’re using—say puppies.cool—you could either point puppies.cool to the bucket directly or use a subdomain, like files.puppies.cool.
Backblaze setup
What you’ll be doing
- Creating a new B2 bucket
- Generating a new Application Key
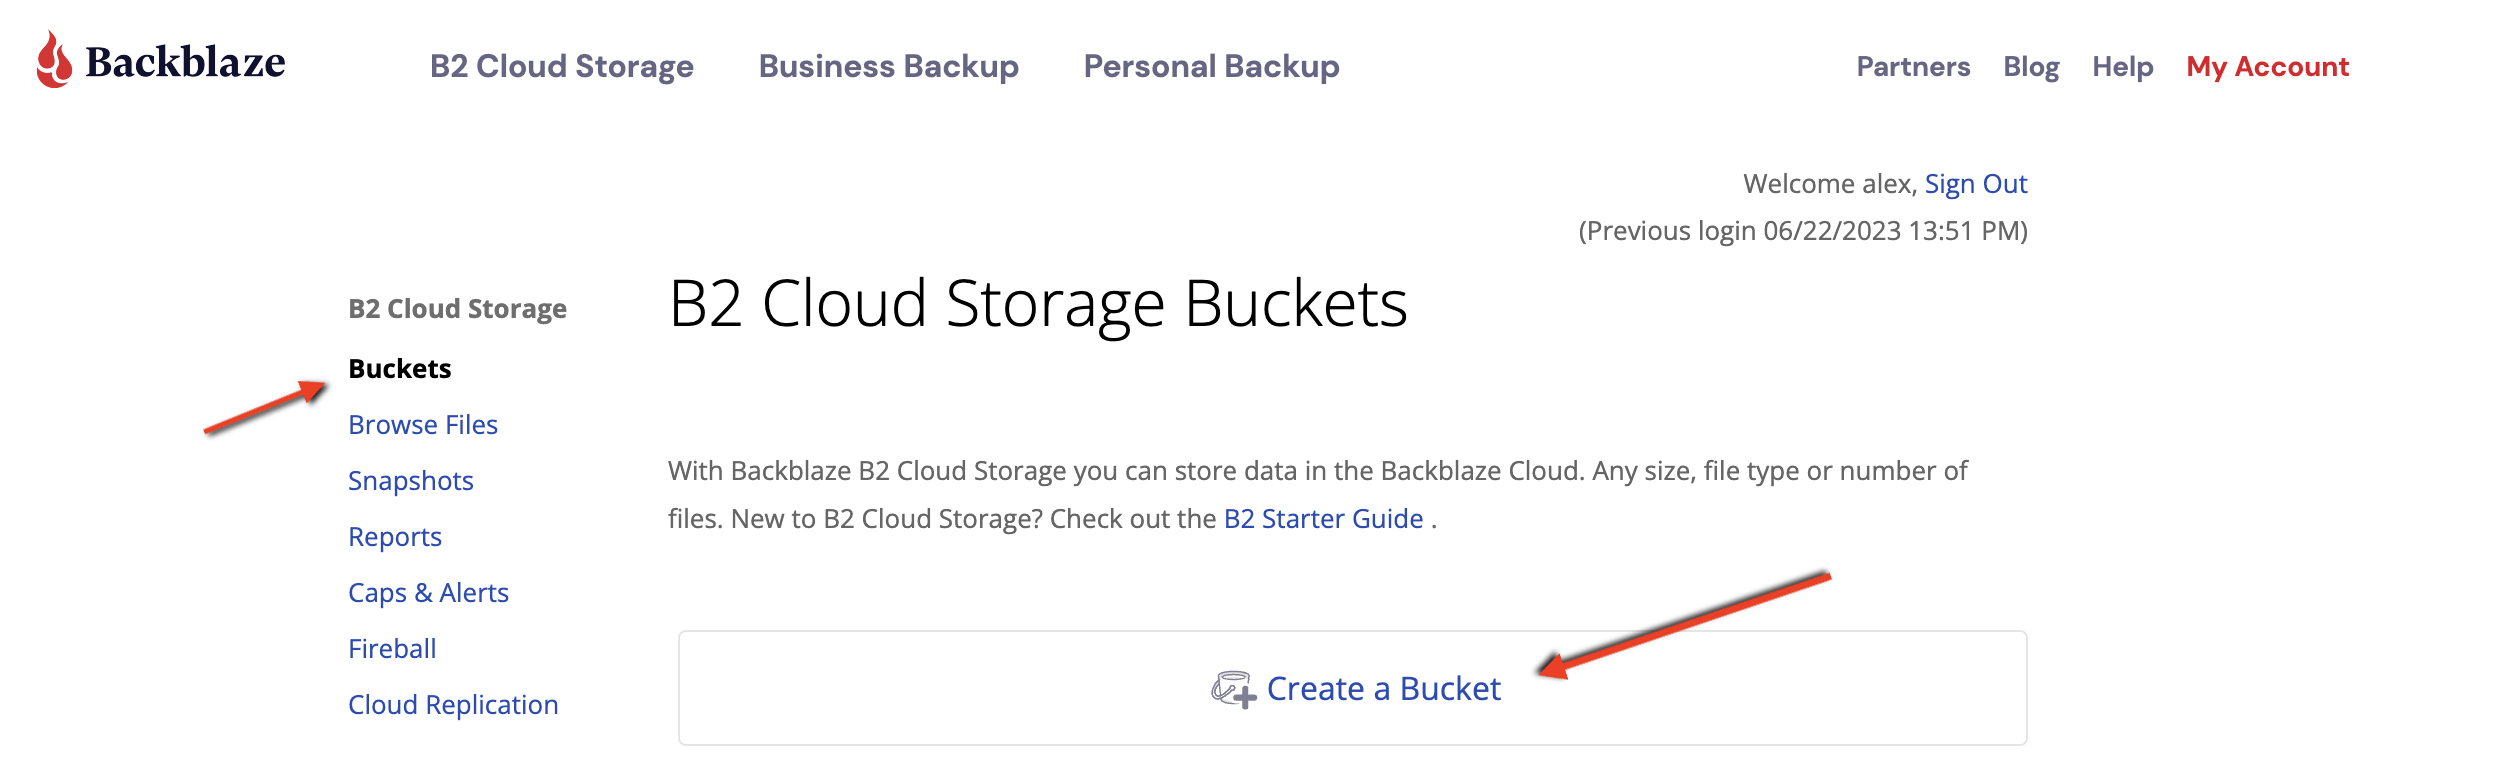
Head over to Backlblaze and log in if you aren’t already. You’ll need to create a new bucket to host your files from Dropshare.
Click “Buckets” then “Create a Bucket.”
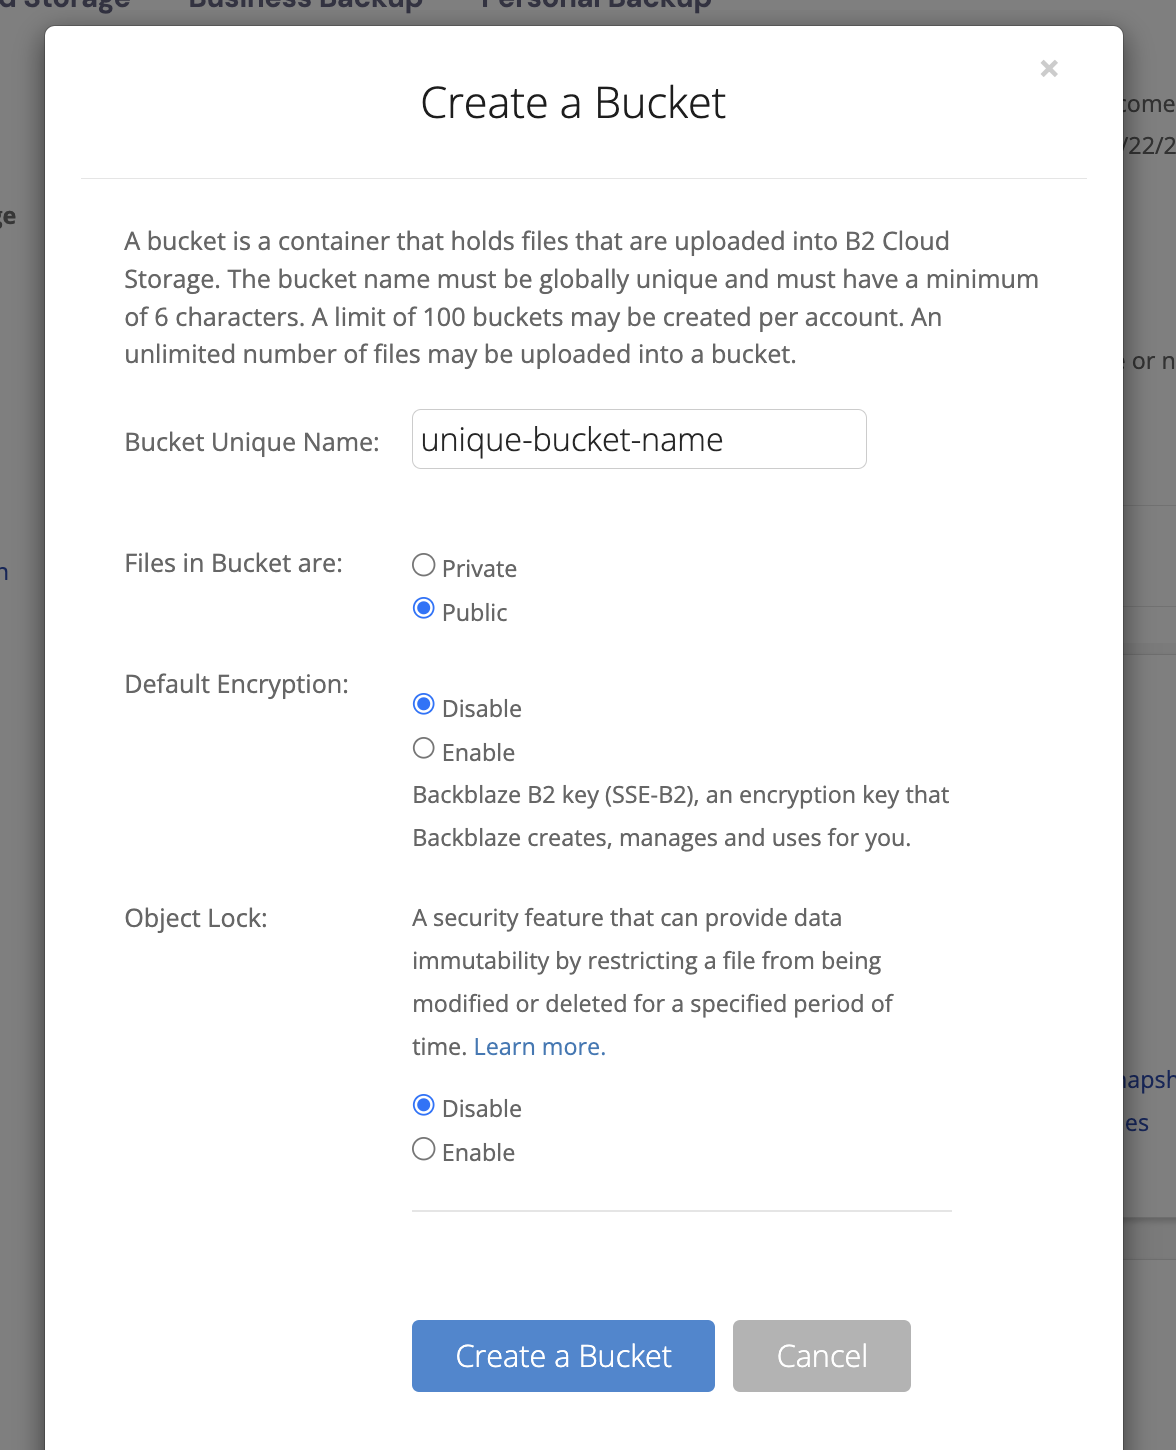
Choose a unique name (I named mine s-alexcaza-com, for example).
Choose public (don’t worry, B2 buckets are read-only when set to public! Write and delete access require an application key). Encryption is up to you, as are the other settings. I left them off or blank.
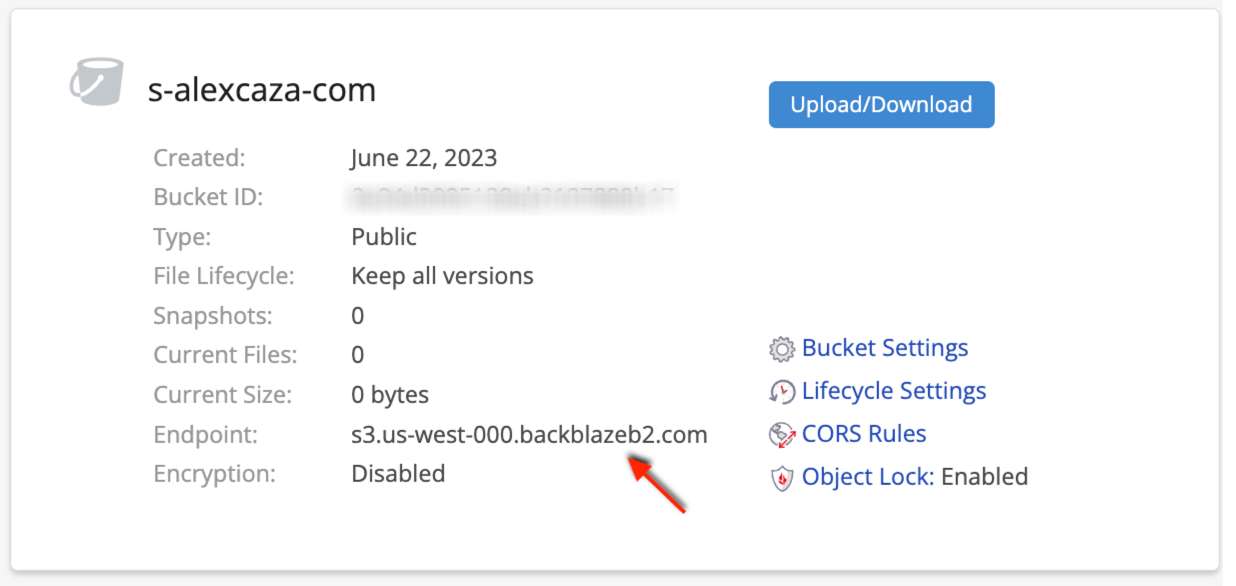
When the bucket is created, take note of the endpoint URL. You’ll need it later.
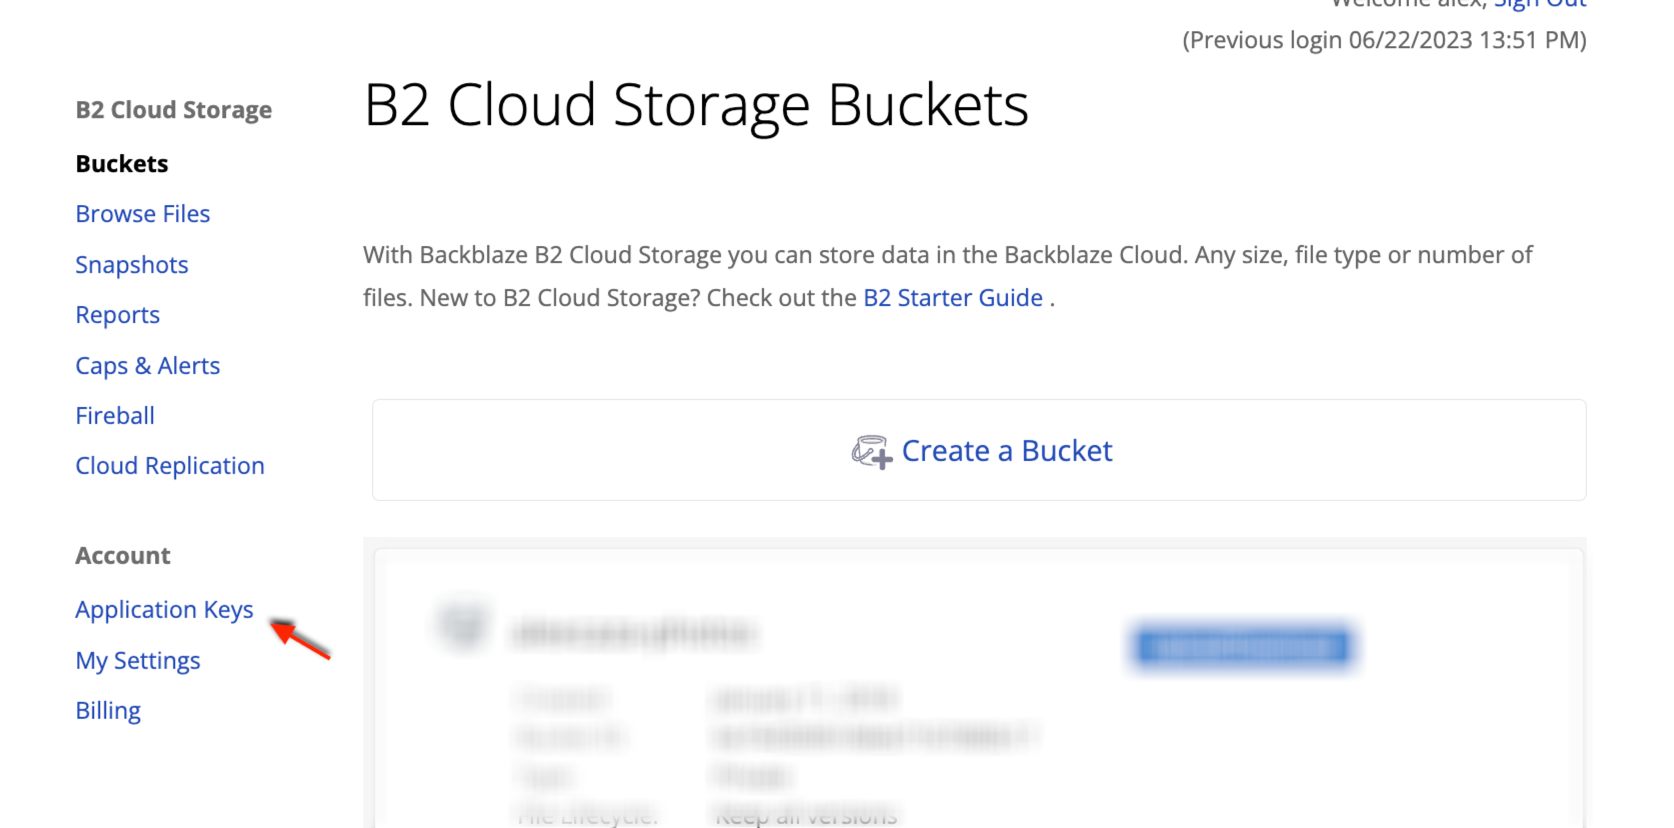
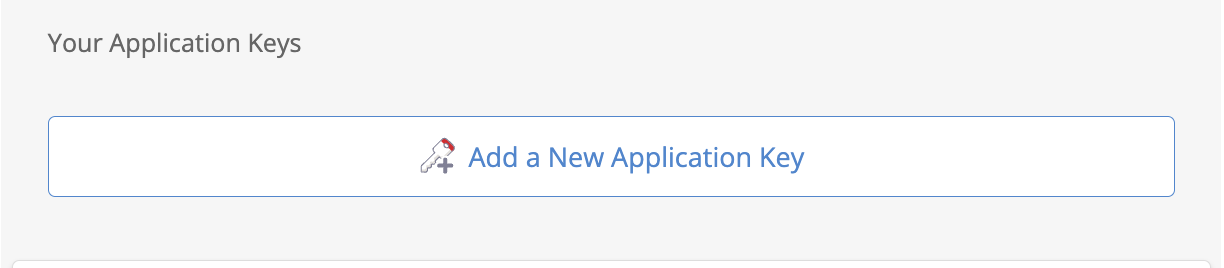
Next, head over to “Application keys.”
Generate a new key and give it a descriptive name so you remember what you use it for. I called mine dropshare-b2.
Copy paste the key information somewhere you can access for the remainder of this walk-through. Possibly the same place you took note of the endpoint URL. Once you’re setup, you can safely delete the file containing this info.

Dropshare
What you’ll be doing
- Adding a third-party cloud service to Dropshare

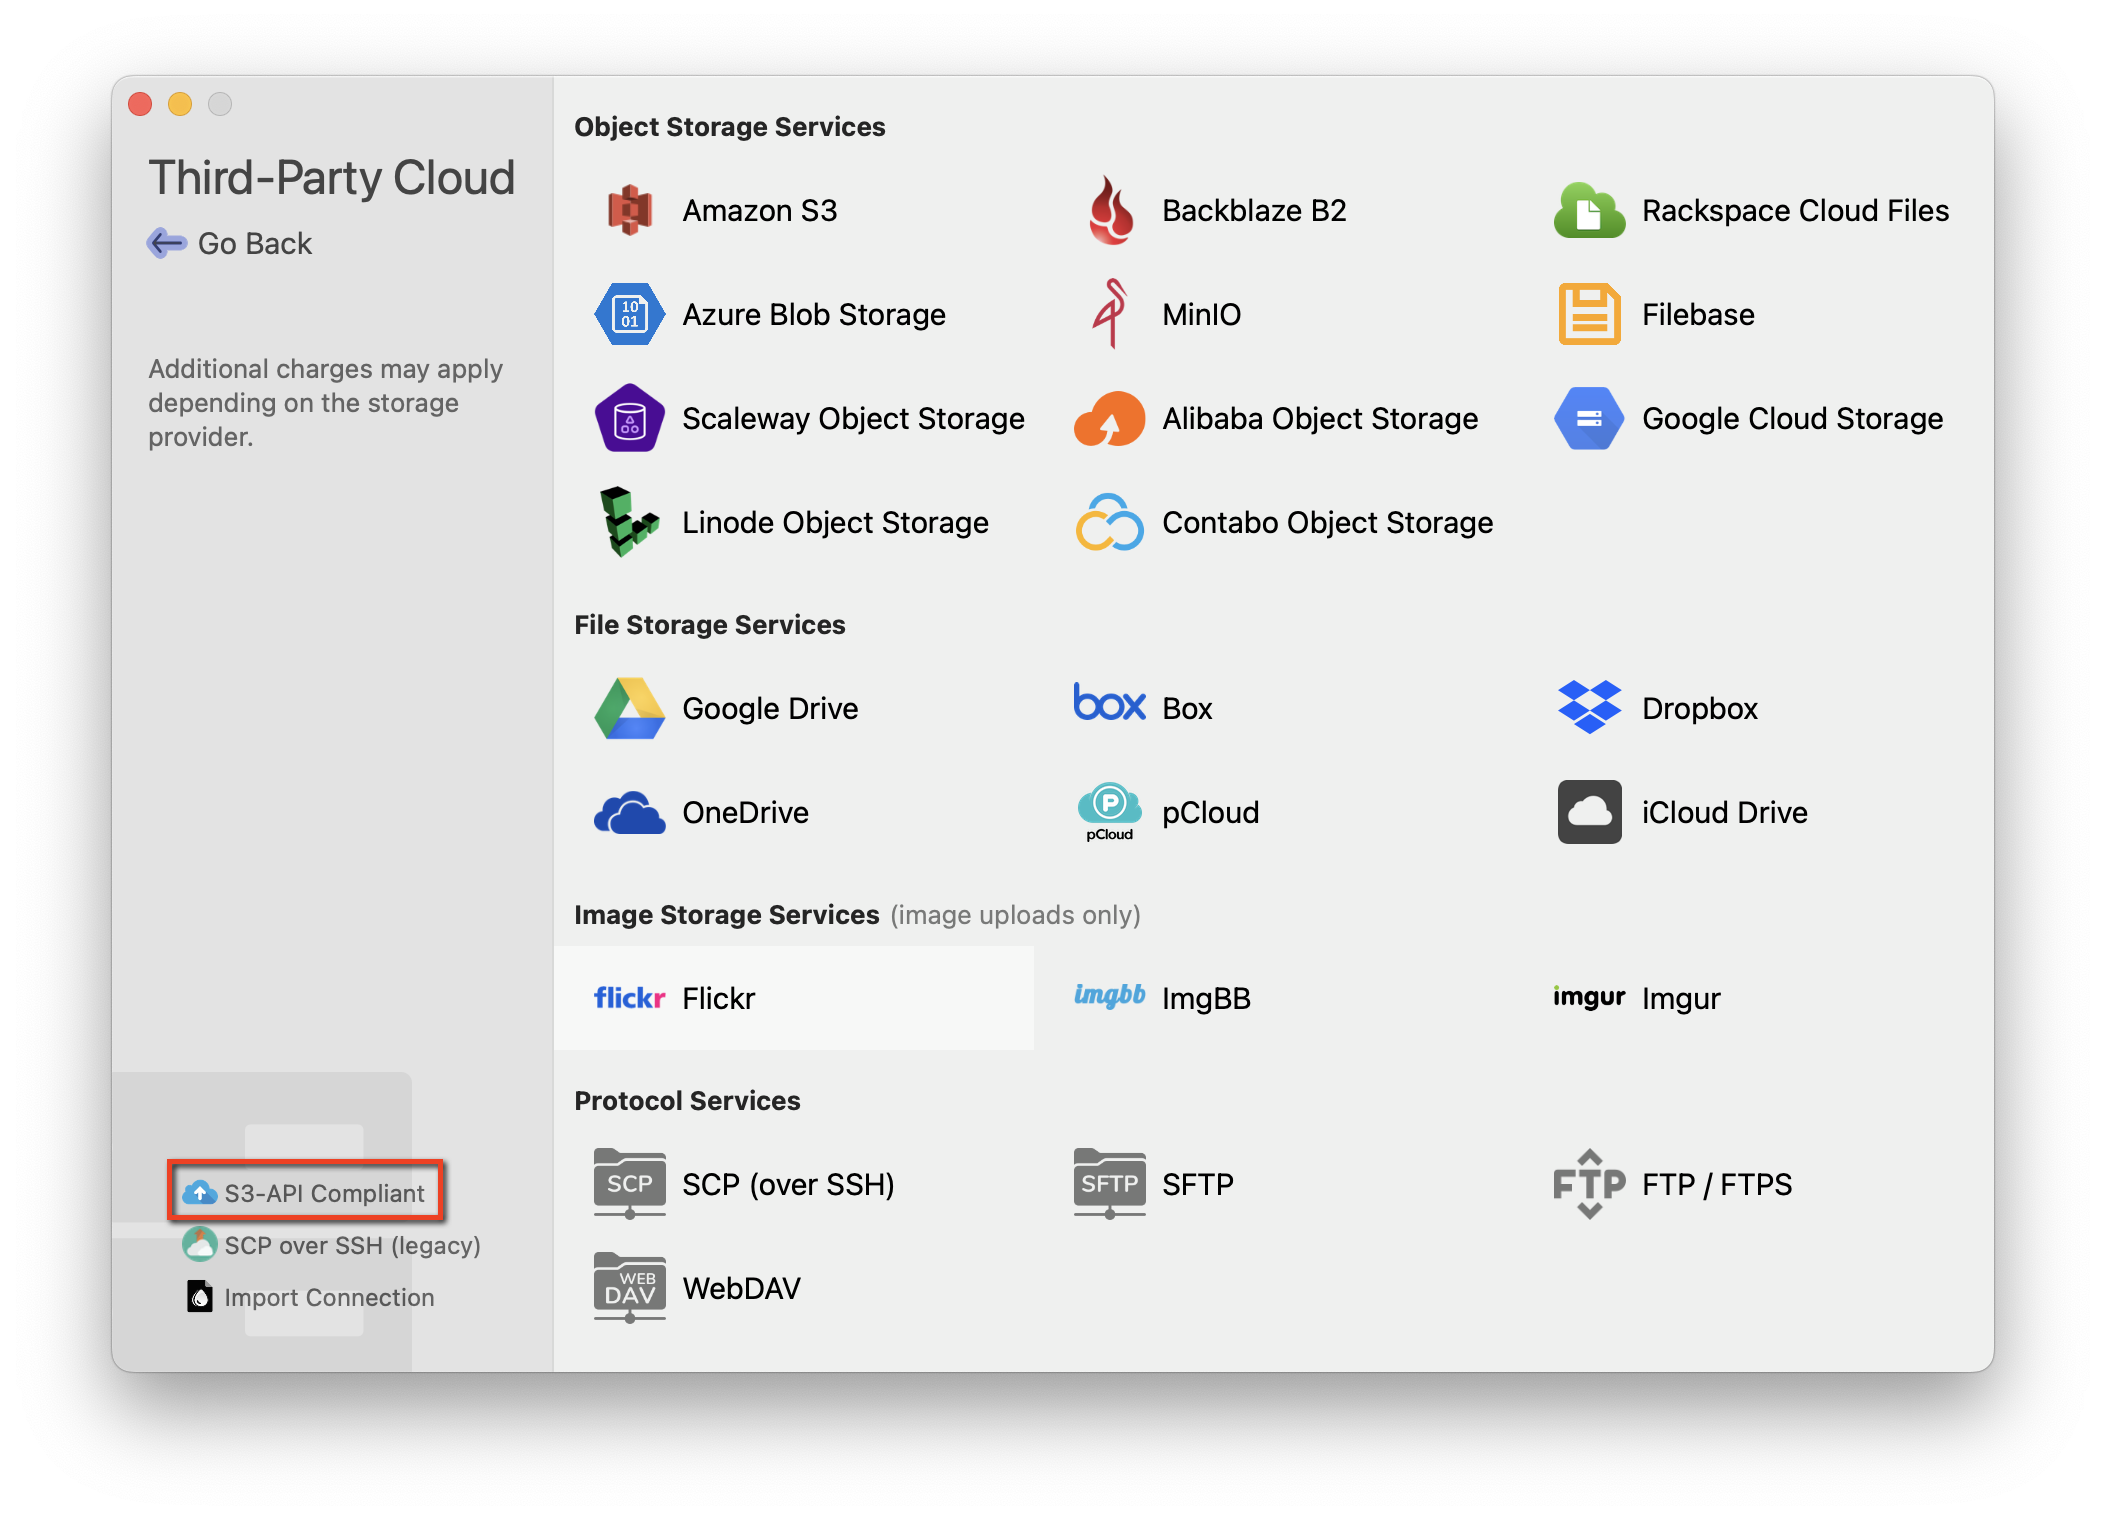
When you first launch Dropshare 5—or go through Preferences -> Connections -> Add Connection—you’ll be presented with the screen above.
Choose “Third-Party Cloud”.
Hold up! Curveball here!
You’ll notice there’s already a Backblaze B2 option listed. While that does work, I find the URLs it generates really ugly.
Instead of s.alexcaza.com/<file-name>, you end up with s.alexcaza.com/files/<bucket-name>/<file-name>. Who the hell wants that?
Since B2 is now compatible with AWS’s S3 API, we’re going to select this tiny option on the bottom left corner.
Next you’ll fill in the following:
- Bucket name is the name you gave your B2 bucket
- Access Key ID is the access key in the file you saved earlier
- Secret key is your Application ID in the same file as your access key
- Server is the endpoint URL you copied earlier
- Domain alias will be the URL you thought of earlier
Make sure you check “Use SSL,” otherwise it will not work.
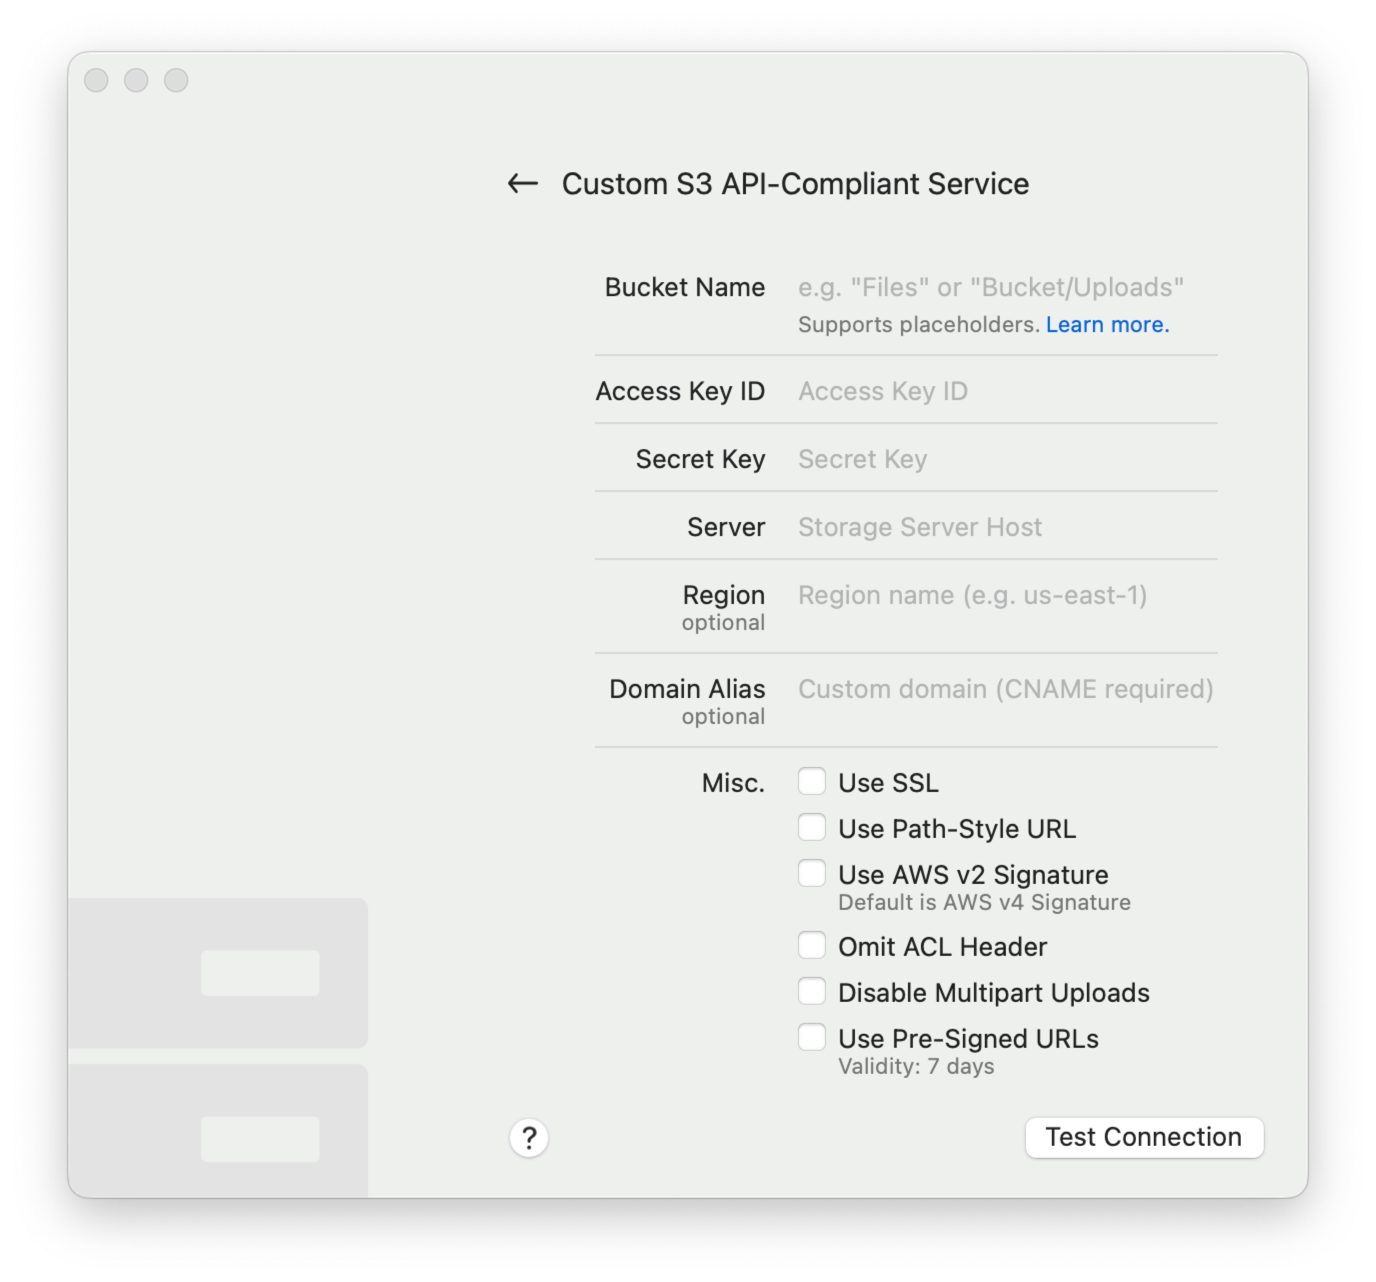
Once that’s filled in, press “Test Connection” and wait for the check mark to appear.
Cloudflare
What you’ll be doing
- Setup a worker route for your new domain
- Use
wranglerto generate a worker based on this template - Creating and modifying a
secrets.jsonfile in the repo - Publishing the worker using
npx wrangler deploy index.js
As stated earlier, you’ll need to have a Cloudflare account with a domain associated to it.
First, open up your terminal of choice and cd to which ever directory you use to store personal code projects.
You’ll be cloning this template project to use with wrangler, which is Cloudflare’s CLI for managing workers.
Once in your directory, run npx wrangler <project_name> https://github.com/alexcaza/dropshare-b2-worker-template && cd <project_name>. Follow any on-screen instructions that might show up.
Once that’s done, you should be inside the directory. From there, run npm i, then npx wrangler login.
You should be taken to Cloudflare to authenticate wrangler with your Cloudflare session. Once you click “Allow”, go back to your terminal and follow any on-screen instructions.
Open a text editor at the root of the project folder. From there, create a new file called secrets.json.
Inside secrets.json, paste the object below, and fill in the values with what the application keys you copied from Backblaze earlier.
{
  "ACCESS_KEY_ID": "<B2_APPLICATION_KEY_ID>",
  "SECRET_ACCESS_KEY": "<B2_APPLICATION_KEY>",
  "DEFAULT_REGION": "<B2_BUCKET_REGION>",
  "S3_BUCKET": "<B2_BUCKET_NAME>.<B2_S3_BUCKET_URL>"
}
Save the file, then go back to your terminal and run npx wrangler secret:bulk secrets.json. This will populate your Cloudflare worker with the secrets you’ve set in the file.
Once that’s done, you can run npx wrangler deploy index.js, which will push the worker to Cloudflare!
Now, head back to Cloudflare and select “Workers Routes” in the side navigation. When looking at the “HTTP Routes” section, click “Add route”.
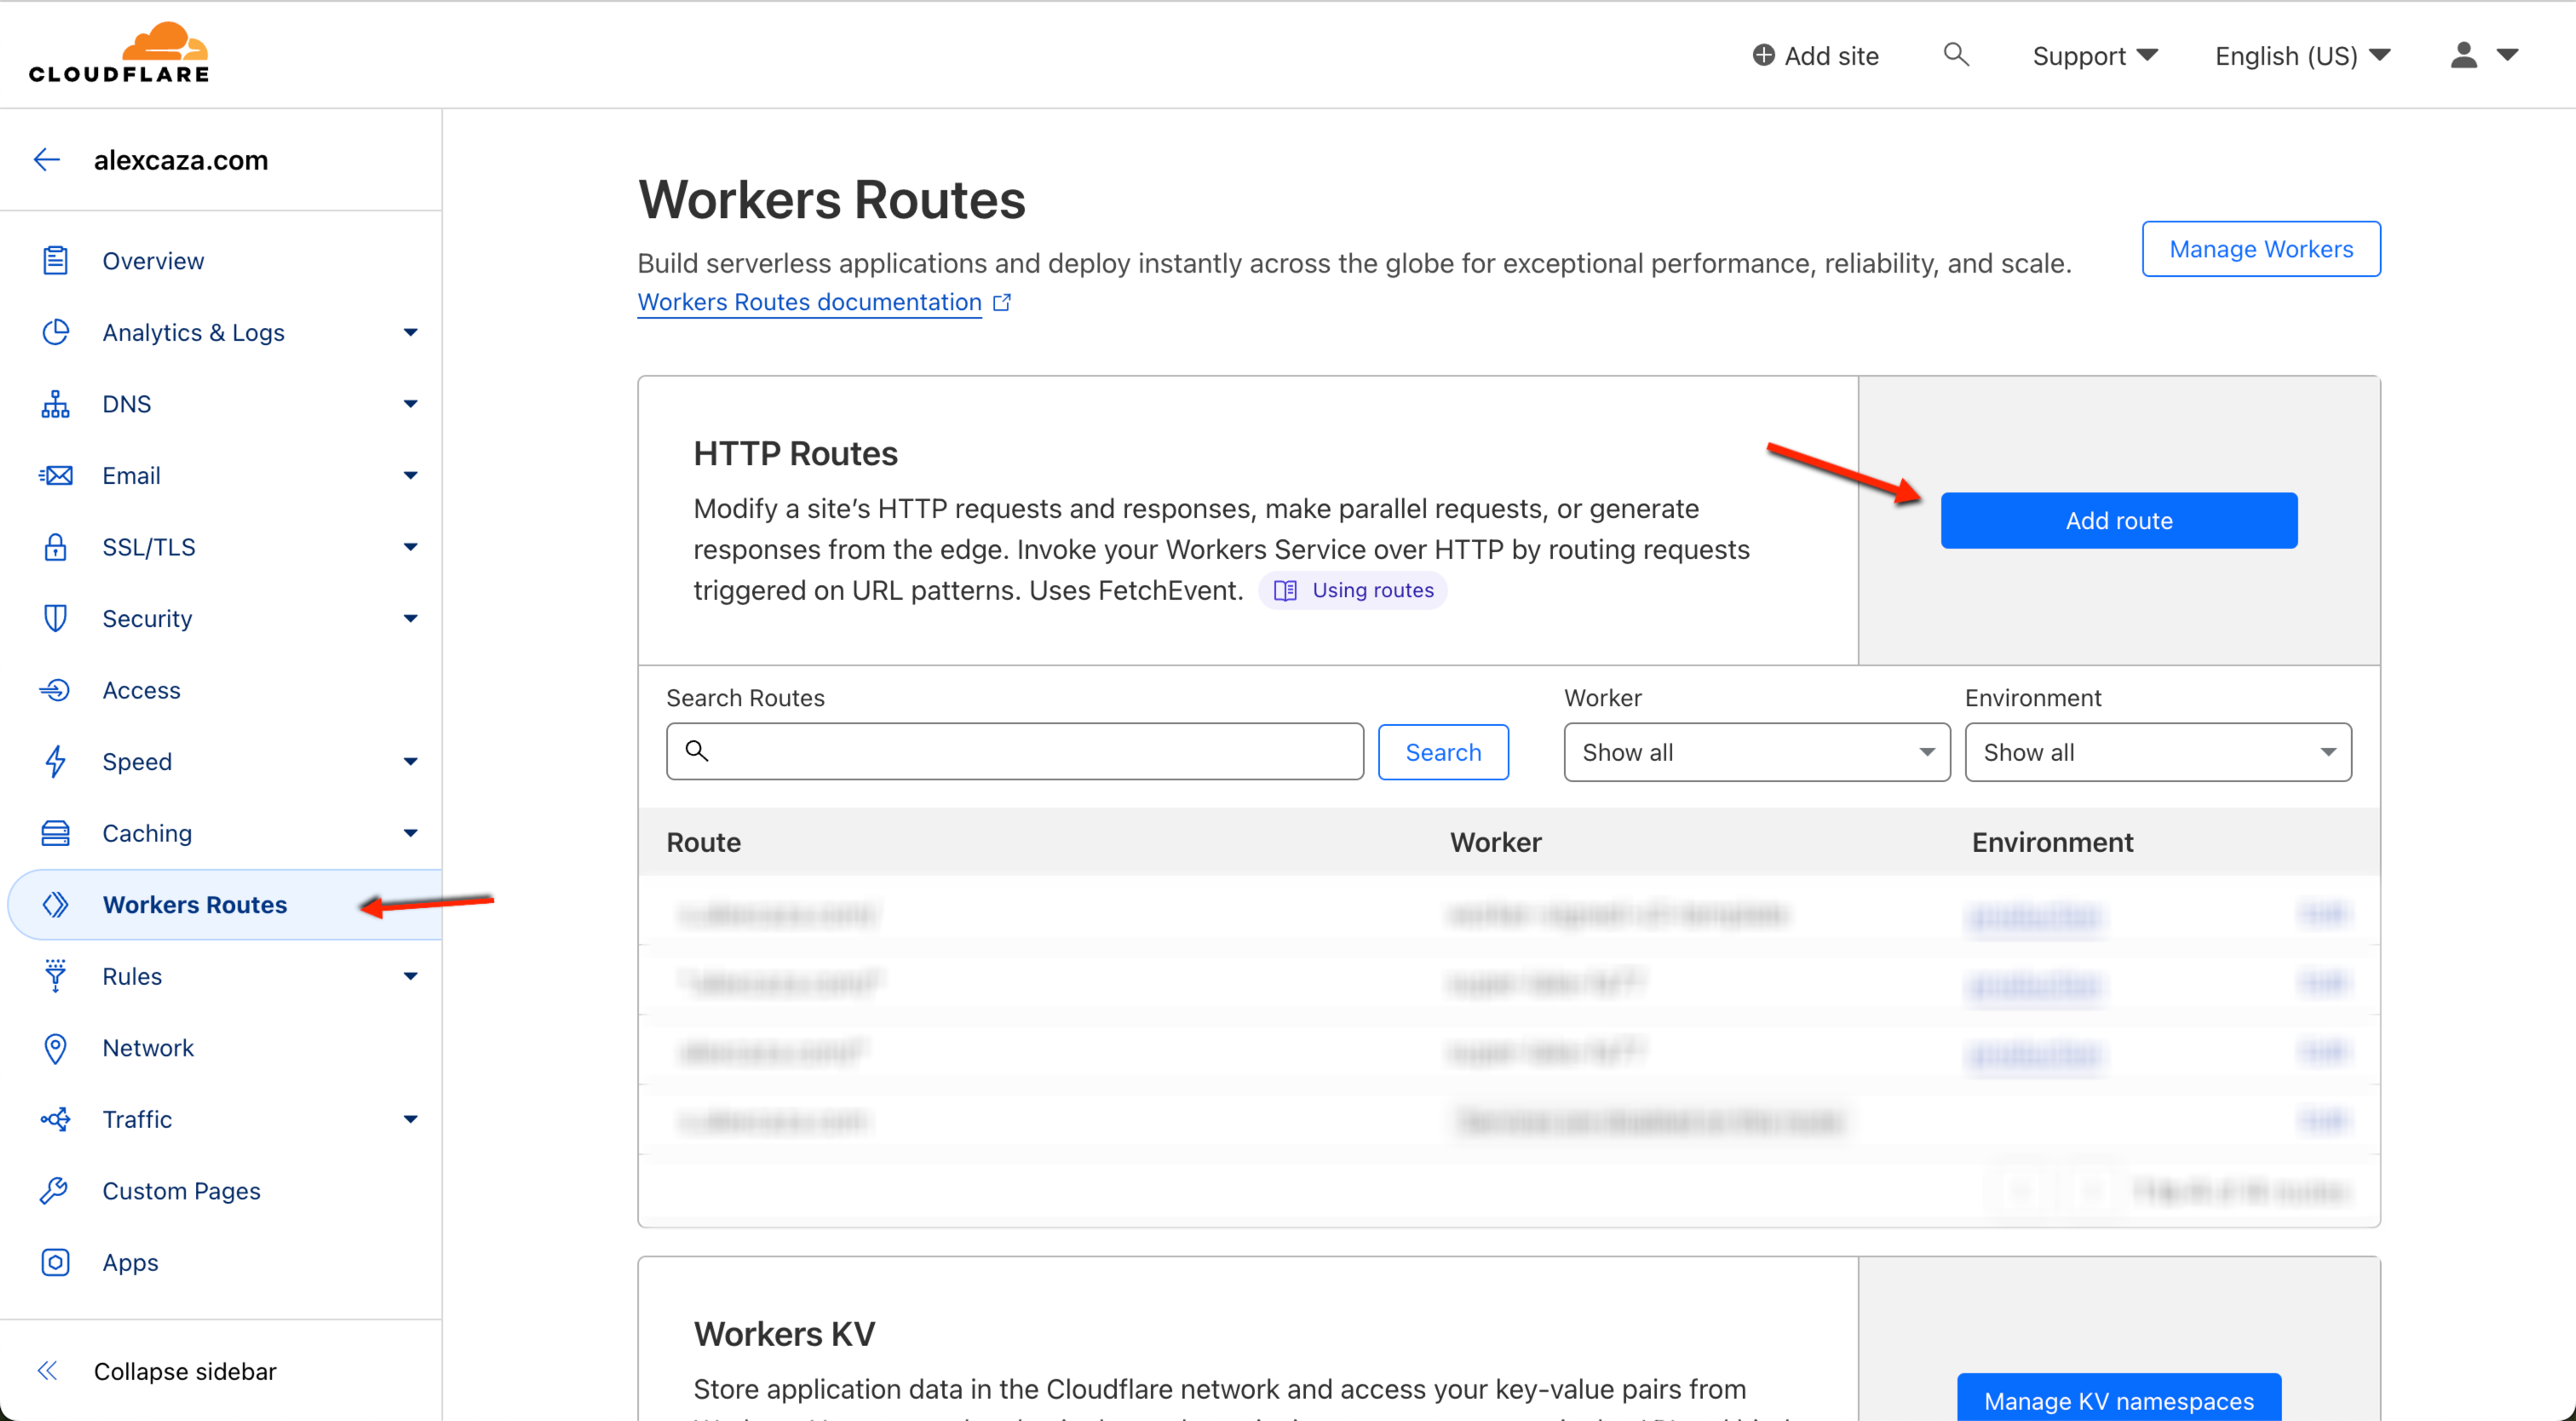
A modal will open. Enter the domain you thought about earlier for the “Route” field, and select the worker you created from the “Service” dropdown. The worker should have same name as the name field in the wrangler.toml file.
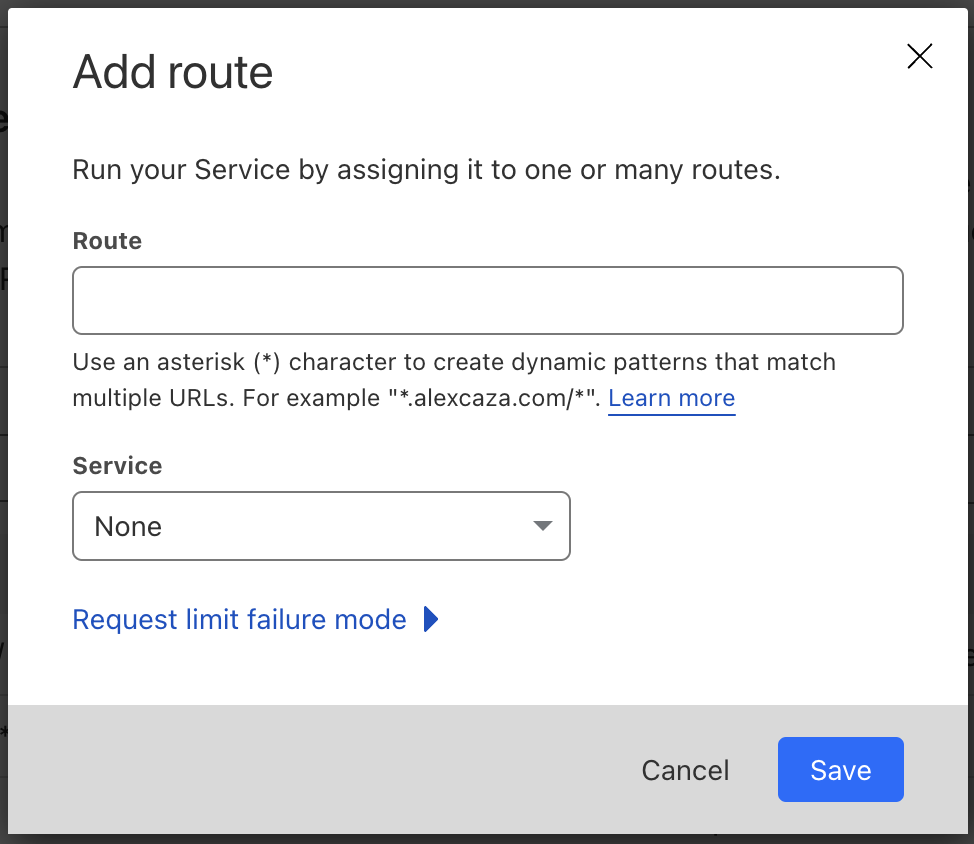
Once you click save, you should be good to go!
Testing it out
Make sure everything is working by taking a screenshot with Dropshare, then open the URL it creates in your browser! You should see the screenshot you just took in staring back at you. 😄
Security notes
B2 buckets by default require an access key for write and delete operations. So, your files should be safe unless your key leaks.
When a B2 bucket is set to public—which is required for this to work—all files in the bucket are accessible and downloadable.
Now, one small measure that’s done in the worker code is a redirect if anyone tries to visit the root path of the domain. Otherwise, the worker returns a list of all files in the bucket, which might not be ideal. The way it’s setup in the template project is to return an empty page when that happens. However, it can be modified to do what you like! I have mine setup to redirect to my personal site.
If you have any notes on how to improve this, let me know! Email me: first name at this domain.